warehouse direct logo
pin
Address

320A Coral Street, Santa Cruz

time
Store Hours

10:00am - 5:30pm

telephone
Call Us Today

(831) 429-8221

  • About Us
    • Our Work
    • Reviews
    • Blog
  • Products
    • Hardwood
    • Carpet
    • Luxury Vinyl Plank (LVP)
    • Luxury Vinyl Tile (LVT)
    • Waterproof Laminate
    • Linoleum
    • Sheet Vinyl
    • Eco – Friendly Floors
    • Refinishing Hardwood
  • Services
    • Installation
      • Hardwood Floor Installation
      • LVP Floor Installation
      • Carpet Installation
    • Residential Services
    • Property Management
    • Real Estate
    • Commercial Flooring
    • Rentals
    • Insurance Restoration
    • Contractors
  • Design Tools
    • Product Visualization Tool
    • Room Measurement Tool
  • Contact Us
Schedule a Free Estimate
warehouse direct logo
  • About Us
    • Our Work
    • Reviews
    • Blog
  • Products
    • Hardwood
    • Carpet
    • Luxury Vinyl Plank (LVP)
    • Luxury Vinyl Tile (LVT)
    • Waterproof Laminate
    • Linoleum
    • Sheet Vinyl
    • Eco – Friendly Floors
    • Refinishing Hardwood
  • Services
    • Installation
      • Hardwood Floor Installation
      • LVP Floor Installation
      • Carpet Installation
    • Residential Services
    • Property Management
    • Real Estate
    • Commercial Flooring
    • Rentals
    • Insurance Restoration
    • Contractors
  • Design Tools
    • Product Visualization Tool
    • Room Measurement Tool
  • Contact Us
×
  • About Us
    • Our Work
    • Reviews
    • Blog
  • Products
    • Hardwood
    • Carpet
    • Luxury Vinyl Plank (LVP)
    • Luxury Vinyl Tile (LVT)
    • Waterproof Laminate
    • Linoleum
    • Sheet Vinyl
    • Eco – Friendly Floors
    • Refinishing Hardwood
  • Services
    • Installation
      • Hardwood Floor Installation
      • LVP Floor Installation
      • Carpet Installation
    • Residential Services
    • Property Management
    • Real Estate
    • Commercial Flooring
    • Rentals
    • Insurance Restoration
    • Contractors
  • Design Tools
    • Product Visualization Tool
    • Room Measurement Tool
  • Contact Us

Why You Probably Don’t Need to Level Your Entire Floor for LVP Installation

March 7, 2026 by Dan Versman

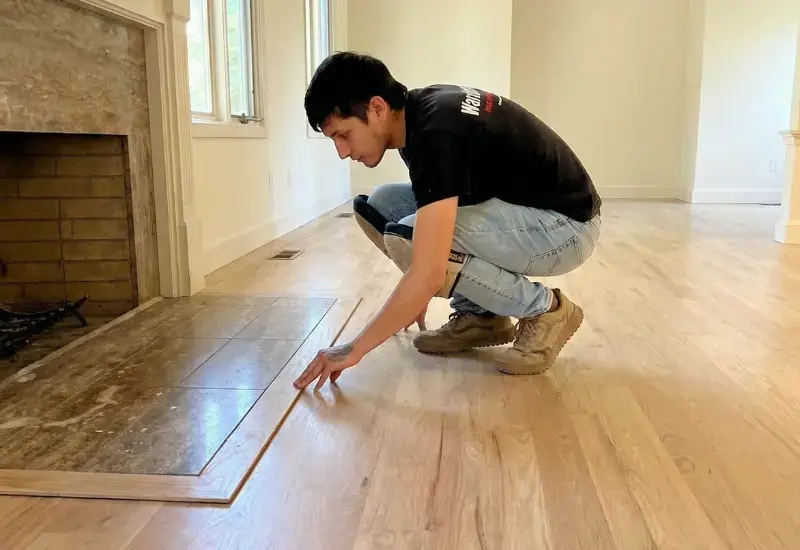
When you choose Warehouse Direct Flooring Outlet for your luxury vinyl plank (LVP) installation, our experienced team knows you can successfully install LVP flooring over concrete or tile without pouring expensive self-leveling compound across entire floors. The professional secret is addressing specific high and low spots to achieve a flat surface, not a perfectly level one and our installers excel at this targeted, cost-effective approach.

The Critical Distinction Our Pros Know: Level vs. Flat

At Warehouse Direct, we’ve installed thousands of LVP floors, and the first lesson we teach our clients is the difference between “level” and “flat.” Understanding this distinction is how we save you thousands of dollars while delivering superior results. This expertise is especially valuable when installing LVP in old houses with uneven floors, where chasing “level” wastes time and money.

What Our Team Checks For

A floor that is level is perfectly parallel to the horizon. Many homes, especially older ones, have floors with slight, consistent slopes. Our installers know this is rarely a problem for floating floors like LVP.

A floor that is flat, however, has no significant bumps, waves, or dips. This is what Warehouse Direct Flooring Outlet’s installation team focuses on and it’s the non-negotiable requirement for successful LVP installation. When planks don’t rest uniformly on subfloors, we see installation failures: seams separating, persistent clicking noise, or floor bubbling. Our professionals prevent these issues by ensuring proper flatness from day one.

How We Diagnose Your Floor

Before we quote any unnecessary work, our team performs a thorough diagnostic using the industry-standard 10-foot rule. This is how we separate honest assessment from contractor upselling.

Our Professional Assessment Process

When our Warehouse Direct Flooring Outlet installers visit your home, they:

  1. Bring professional-grade straightedges: Our team uses calibrated 8- to 10-foot tools for accurate readings.
  2. Thoroughly inspect every area: We systematically check your entire floor, rotating straightedges in multiple directions to find every imperfection.
  3. Identify all gaps: Our experienced eyes catch the low spots and dips that DIYers often miss.
  4. Apply manufacturer standards: We measure gaps against the industry requirement no more than 3/16-inch over a 10-foot span ensuring your installation meets warranty requirements.
  5. Create a detailed fix plan: Rather than recommending expensive full-floor leveling, we map exactly which spots need attention.

This diagnostic process is included in every consultation, and it’s how we ensure you only pay for the prep work your floor actually needs.

Our Strategic Fix: Professional Spot-Treatment

Once our team identifies problem areas, skilled installers use proven techniques to create perfectly flat surfaces efficiently and cost-effectively.

How We Handle High Spots

Our professionals come equipped with industrial-grade grinding tools. When we find high spots on your concrete subfloor, our team:

  • Uses professional diamond cup wheel grinders for efficient, precise grinding
  • Constantly checks progress with straightedges to ensure perfection
  • Knows exactly how much material to remove without over-correcting
  • Completes the work quickly with minimal dust using professional equipment

This is skilled work that our installers perform daily, ensuring your subfloor meets exact specifications.

Our Approach to Low Spots and Imperfections

Low spots are where amateur installations often fail. The Warehouse Direct Flooring Outlet team prevents these failures by:

Professional patching technique:

  • Mixing cementitious compounds to perfect consistency every time
  • Using professional troweling techniques for seamless patches
  • Screeding with precision straightedges to avoid creating new high spots
  • Knowing exact cure times before proceeding with installation

Our team handles everything from minor cracks to deep depressions. When clients ask, “Can you install LVP over cracked concrete?”The answer from Warehouse Direct is always yes because we know exactly how to prepare it properly.

For tile installations, our professionals expertly skim coat entire floors to fill grout lines, creating the monolithic flat surface essential for long-lasting LVP performance.

Why Choose Professional Installation from Warehouse Direct Flooring Outlet

Spot-Fixing with Expert Precision

When you choose Warehouse Direct Flooring Outlet, you get:

Cost savings without compromise:

  • We only fix what needs fixing, no unnecessary full-floor pours
  • Professional-grade materials at our wholesale pricing
  • Faster completion means lower labor costs passed to you
  • Work completed correctly the first time, no costly do-overs

Professional expertise:

  • Installers with years of experience reading subfloors
  • Knowledge of every LVP manufacturer’s specific requirements
  • Professional-grade tools that deliver superior results
  • Warranty protection on both materials and installation

Best for: The vast majority of residential projects which is why Warehouse Direct Flooring Outlet recommends this approach for most clients. Our team excels at installing LVP on basement concrete, over tile, and on older subfloors with typical age-related imperfections.

When Full Leveling Is Actually Necessary

Warehouse Direct Flooring Outlet’s honest assessment means we’ll tell you when a full self-leveling pour is truly needed. However, this represents less than 10% of the projects we evaluate.

When it is necessary, our team:

  • Sources professional-grade leveling compounds at competitive prices
  • Has the experience to mix and pour perfectly on the first attempt
  • Manages cure times efficiently to keep your project on schedule
  • Guarantees the results with our installation warranty

Best for: Subfloors with severe, widespread damage and Warehouse Direct Flooring Outlet will only recommend this when your floor truly needs it.

Warehouse Direct Recommends the Right Products

Our showroom carries the best LVP products for various subfloor conditions, and our team guides you to the right choice for your specific situation.

We Recommend Rigid Core LVP

The flooring experts at Warehouse Direct Flooring Outlet consistently recommend SPC (Stone Plastic Composite) flooring for challenging subfloors. Why? Because its dense, rigid core has superior bridging capabilities that forgive minor imperfections our team might encounter.

When you shop at our warehouse, we’ll show you:

  • Quality SPC planks 5mm thick or greater
  • Products with excellent manufacturer warranties
  • Options that work specifically with your subfloor type
  • Styles that match your aesthetic at competitive prices

What We Don’t Recommend: The Thick Underlayment Myth

Warehouse Direct Flooring Outlet’s installers frequently encounter DIY projects that failed because homeowners tried using thick underlayment to compensate for uneven floors. Our professionals know you cannot use thick underlayment to level floors for LVP, it creates too much vertical movement, causing locking systems to fail.

Instead, our team installs:

  • Simple moisture barriers when needed for concrete slabs
  • The pre-attached pad that comes with quality SPC planks
  • Only what’s actually required for your successful installation

Three Ways Warehouse Direct Flooring Outlet Serves Different Clients

For the Budget-Conscious Homeowner

What you get: Professional assessment and installation at competitive prices because we don’t recommend unnecessary work.

When you choose Warehouse Direct Flooring Outlet, our team performs the 10-foot flatness check with professional precision. We’ll show you exactly what your floor needs, provide transparent pricing, and complete targeted prep work efficiently. Our installers use professional-grade patching compounds and grinding equipment to achieve pro-level results at a fraction of the cost competitors quote for full leveling jobs.

We’ll guide you to quality, rigid core (SPC) planks from our showroom that provide extra forgiveness for your specific subfloor, ensuring long-lasting results without premium pricing.

For Homeowners Who Value Peace of Mind

What you get: Expert guidance preventing costly contractor mistakes and ensuring manufacturer warranties remain valid.

Before you even request quotes from other contractors, come to Warehouse Direct Flooring Outlet for an honest assessment. If you’ve received quotes for multi-thousand-dollar self-leveling jobs, our team will show you exactly why it is or isn’t necessary using straightedges and manufacturer specifications not sales pressure.

Our transparent approach ensures you’re paying for what your floor actually needs. Many clients find our quoted price for professional spot-treatment and installation is less than competitors charge for unnecessary full leveling.

For First-Time LVP Buyers

What you get: Educational guidance and confidence that your investment is protected.

Warehouse Direct Flooring Outlet’s team excels at helping first-time buyers. We’ll explain clearly: Flat, not level. We’ll show you your chosen LVP product’s installation guide and explain the exact flatness tolerance (typically “3/16 inch in 10 feet”).

Our installers methodically check every spot, mark what needs attention, and fix those specific areas with precision. This clear, professional approach prevents 99% of future flooring failures and ensures you can enjoy your beautiful new floors with complete confidence.

Your Complete LVP Solution Starts at Warehouse Direct Flooring Outlet

A successful, long-lasting LVP floor is built on solid, flat foundations and that’s exactly what Warehouse Direct Flooring Outlet’s professional installation team delivers. By focusing on strategic spot-fixing instead of costly full-floor leveling, we achieve professional results while saving you significant time and money.

Ready to get started?

Visit Warehouse Direct Flooring Outlet today for:

  • Free professional floor assessment using industry-standard diagnostic tools
  • Honest, transparent pricing with detailed explanations of recommended prep work
  • Expert product selection from our extensive showroom inventory
  • Professional installation backed by our warranty
  • Complete project management from assessment through final walkthrough

Don’t trust your flooring investment to guesswork or inflated contractor quotes. Let Warehouse Direct Flooring Outlet’s experienced team handle your LVP installation with the precision and efficiency that comes from years of professional experience.

Contact Warehouse Direct Flooring Outlet today for your free assessment and straightforward quote. Visit our showroom, call us, or schedule your consultation online and discover why smart homeowners trust us for honest advice and superior installation results.

Filed Under: Uncategorized

LVP vs. Laminate Flooring: Which One Really Survives a High-Traffic Home?

February 27, 2026 by Dan Versman

For high-traffic areas, the choice between LVP and laminate flooring depends on the type of wear your floor will face. Luxury Vinyl Plank (LVP) is the superior choice for areas with high moisture risk, like kitchens or mudrooms, due to its 100% waterproof polymer core. However, for dry, high-traffic zones like hallways and living rooms, premium laminate often lasts longer thanks to a tough, aluminum oxide-infused wear layer that offers superior resistance to daily scratches and scuffs from pets, shoes, and furniture.

Beyond the Waterproof Label

When you walk into flooring showrooms, “durability” is the word you hear most often. But what does it actually mean? For years, the conversation has been dominated by one single factor: water. This has positioned Luxury Vinyl Plank (LVP) as the default champion of durable flooring. And for good reason—it’s inherently waterproof.

But true, long-term durability in busy homes is a much more complex story. It’s a story of daily abuse, not just occasional spills. The question of which flooring holds up best over time isn’t just about surviving plumbing leaks. It’s about enduring relentless scraping of dining chairs, frantic clawing of dogs chasing balls, and grinding of tracked-in grit underfoot.

Understanding Core Material Differences

The fundamental difference between vinyl plank and laminate begins deep inside planks, in core materials. This composition dictates everything from water resistance to how floors feel underfoot and how they react to stress.

Laminate’s Wood-Based Core

At its heart, laminate flooring is a wood product. Its core is made from wood byproducts bonded with resins, typically forming high-density fiberboard (HDF). This HDF core gives laminate its rigid, substantial feel, which many homeowners find appealingly similar to hardwood. However, this wood-based nature is also its primary vulnerability. While top surfaces are sealed, significant water exposure seeping into seams can cause cores to swell, warp, and delaminate—damage that is typically irreversible.

LVP’s Polymer Core

Luxury vinyl plank is a completely synthetic product. Its core is made from plastic composites, most commonly WPC (Wood Plastic Composite) or SPC (Stone Plastic Composite). This is the key to its biggest selling point: LVP is 100% waterproof. Vinyl flooring’s synthetic materials enhance its moisture resistance, allowing water to sit for long periods without causing damage. An SPC core, being denser and more rigid, offers even greater impact resistance than WPC, making it popular for commercial spaces and very active homes.

The Surface Battle: Scratch vs. Dent Resistance

While cores dictate how floors handle water, topmost layers dictate how they handle daily life. This is where high-traffic performance truly diverges, creating a fascinating paradox of strengths and weaknesses.

Laminate’s Aluminum Oxide Advantage

Premium laminate flooring is protected by an incredibly tough, transparent topcoat. This wear layer is a clear aluminum oxide layer to protect floors against scratches—one of the hardest materials used in flooring manufacturing. Because laminate is sealed with such a tough wear layer, it’s extremely durable against the kind of abrasive wear that makes floors look old before their time.

This aluminum oxide layer is why high-end laminate often provides the best answer to what flooring doesn’t scratch easily. It’s a formidable defense against pet claws, dragged toys, office chairs, and fine grit acting like sandpaper under every footstep. Durability is measured by an Abrasion Class or “AC” rating. For high-traffic home flooring solutions, look for AC3 or AC4 ratings. For commercial flooring for retail stores or other business settings, AC5 ratings provide maximum scratch and scuff resistance. When subjected to rigorous testing where flooring is subjected to abrasive paper discs, the best flooring is unscathed after 500 cycles, or 1,000 abrasive rubs, simulating years of heavy foot traffic.

The LVP Dent vs. Scratch Paradox

Luxury vinyl plank’s wear layer is different. It’s a layer of clear PVC vinyl, and its thickness is measured in mil (thousandths of an inch). Quality LVP for residential use should have wear layers of at least 12 mil, with 20 mil or higher being ideal for heavy foot traffic and commercial-grade applications. While this vinyl layer is tough, it is inherently softer than laminate’s aluminum oxide coating.

This leads to the “dent vs. scratch” paradox. LVP’s softer, more resilient construction (both core and wear layer) makes it superior at absorbing impacts. Drop a heavy can in the kitchen, and LVP is more likely to flex and absorb the blow, resulting in no damage or a minor dent. Laminate’s rigid surface is more likely to chip or “crater” from the same impact. This superior dent resistance is a clear LVP advantage.

However, that same softness makes surfaces more prone to fine scratches and deep gouges. While it resists dents from dropped objects better, heavy furniture dragged across LVP can slice into vinyl wear layers more easily than it could scratch high-quality laminate floors. This is the crucial trade-off many homeowners overlook when only focusing on the waterproof aspect.

Room-by-Room Analysis for High-Traffic Homes

Entryways, Hallways, and Living Rooms

Winner: Laminate

These are the arteries of your home, seeing the most constant foot traffic. The primary threat isn’t puddles of water; it’s abrasive wear. Dirt, sand, and pebbles tracked in on shoes are the number one enemy. For these specific areas, laminate’s superior scratch resistance (from AC4-rated products) provides more durable surfaces against claws, toy cars, and general daily chaos. This makes it one of the best flooring options for hallways and stairs and a top choice for active family rooms.

Kitchens, Bathrooms, and Mudrooms

Winner: LVP

In these spaces, moisture is the clear and present danger. From overflowing sinks and dishwasher leaks to wet boots and bath time splashes, water damage risk is constant. Vinyl flooring is 100% moisture-resistant, making LVP the undeniable champion. Its ability to handle spills and impacts from dropped pots and pans makes it the better long-term flooring investment for these demanding, wet-prone environments. While water-resistant laminate exists, the peace of mind offered by truly waterproof floors like LVP is invaluable.

Basements

Winner: LVP

Basements are below-grade and inherently susceptible to moisture issues, from high humidity to potential leaks or flooding. Laminate’s wood core is a non-starter here. LVP, especially rigid SPC core products, is the best flooring for basements. It is dimensionally stable in changing temperatures and completely impervious to water damage, providing durable and worry-free solutions.

Common Questions Answered

Is vinyl or laminate better for high-traffic areas?
It depends on the type of traffic. For abrasive traffic (scratches from dirt, pets, and dragging items) in dry areas, high-AC-rated laminate is better. For areas with heavy foot traffic combined with spill and moisture risk, LVP is better.

Can you put a refrigerator on top of vinyl plank flooring?
Yes, you can. LVP can withstand heavy furniture. However, it’s crucial to use furniture protectors under feet or wheels to distribute weight and prevent indentation or gouging of wear layers over time. Avoid dragging or sliding it across floors during installation or moving.

Does LVP devalue a home compared to laminate?
Neither LVP nor laminate will add the resale value of genuine hardwood, but both are seen as modern, desirable upgrades over old carpet or sheet vinyl. High-quality installation and stylish, contemporary looks have more impact on potential buyers’ perception than material differences between the two.

Choosing Based on Your Needs

Busy Families

Needs: Flooring for high-traffic living rooms or hallways with children and pets. Prioritizes resistance to daily scratches from toys and claws over 100% waterproof capability.

Recommendation: Your primary concern is surface durability against constant, abrasive wear. High-quality laminate with AC4 ratings is likely your best choice. Its aluminum oxide wear layer offers superior protection against the daily grind of family life, keeping floors looking newer for longer compared to LVP that may show fine scratches more readily.

Practical Landlords

Needs: Cost-effective, durable flooring for rental unit main areas that can withstand tenant turnover, moving furniture, and frequent foot traffic with minimal surface damage.

Recommendation: For rental property durability, laminate presents a compelling case for living areas and bedrooms. Its resistance to scratching from moving furniture is a significant advantage during tenant turnover. For kitchens and bathrooms in rentals, LVP installation remains the safer, waterproof option to prevent costly subfloor repairs from tenant mishaps.

Basement Renovators

Needs: Flooring for below-grade spaces with dampness or leak risk. Primary decision factor is material’s ability to withstand moisture, making waterproof cores essential.

Recommendation: This is an easy decision. LVP is the only suitable option. Its 100% polymer core is completely impervious to water, making it perfect waterproof flooring for busy homes and moisture-prone basements. Choose SPC (Stone Plastic Composite) cores for added rigidity and dent resistance in newly renovated spaces.

Choosing between LVP and laminate flooring requires careful examination of your own home and lifestyle. By understanding core differences in how they’re made and how they wear, you can select the right material that not only looks beautiful but also provides lasting performance for years to come.

Filed Under: Uncategorized

Is LVP Flooring Really Waterproof? The Truth About What Marketing Doesn’t Tell You

February 15, 2026 by Dan Versman

Yes, individual luxury vinyl planks (LVP) are genuinely waterproof, but this creates a dangerous misconception. A truly waterproof LVP floor system that protects your home from water damage in high-moisture areas like bathrooms, kitchens, and laundry rooms depends almost entirely on meticulous installation that seals vulnerable seams and perimeter against subfloor moisture penetration.

Understanding the “Waterproof” Promise

Walk into any flooring showroom, and you’ll be met with “100% waterproof” signs hanging over luxury vinyl plank displays. It’s a powerful marketing term promising peace of mind, especially for homeowners seeking waterproof flooring alternatives to tile. But the word “waterproof” requires a critical distinction: we must separate the properties of the material from the performance of the final, installed floor.

Waterproof Planks vs. Waterproof Floor Systems

The marketing claims are, in a very specific sense, true. The plank itself is waterproof. Luxury vinyl is a composite material, typically made with solid polymer cores (SPC – stone polymer composite or WPC – wood polymer composite) and durable vinyl top layers. You can submerge a single plank in water for a week, and it will emerge unchanged. It won’t swell, warp, or disintegrate like laminate or hardwood.

Many top-rated waterproof vinyl plank brands have products with robust construction. Some popular LVP brands feature 22-mil wear layers and cores whose waterproof construction makes them suitable for bathrooms. LVP flooring doesn’t swell with water. This inherent moisture resistance is why it has become go-to flooring for pet-proof and child-friendly waterproof applications.

However, you’re not installing a single, seamless plank in your home. You’re installing dozens or hundreds clicked or glued together. This collection of planks creates a floor system, and the system is only as waterproof as its weakest points.

Where LVP Systems Can Fail

If planks are waterproof, where does danger lie? The vulnerability is not in the material but in the multitude of gaps between them. While seams are tight, they’re not hermetically sealed, creating potential pathways for water to reach subfloors.

The Truth About Seams and Joints

Can water get through LVP joints? The answer is absolutely yes, especially under the right conditions. Everyday spills wiped up quickly are not the primary concern. The real risk comes from standing water—overflowing toilets, leaking dishwasher hoses, or children splashing water out of tubs night after night. When water sits on floors for extended periods, it can and will find its way down through click-lock mechanisms or plank edges.

While vinyl flooring is popular because it’s moisture-resistant, experts acknowledge that “it can be slightly vulnerable at the seams,” where water could seep through and cause damage to wood or concrete subfloors beneath. This is the critical detail that “100% waterproof” labels fail to address.

What Happens When Water Gets Under LVP

Once moisture penetrates LVP flooring seams, it becomes trapped. The waterproof nature of planks now works against you, preventing trapped water from evaporating. This creates dark, damp environments perfect for mold and mildew breeding, causing serious health issues and musty odors difficult to eliminate.

Worse yet, water begins damaging subfloors. Wood subfloors rot, swell, and lose structural integrity. Concrete subfloors grow mildew and begin degrading. This hidden water damage is far more destructive and expensive to repair than simply replacing a few planks. By the time you notice soft spots or discolored baseboards, damage is already extensive.

Installation: The True Secret to Waterproof LVP Floors

The difference between floors that are merely water-resistant and those that are truly waterproof lies in installation quality. Professional waterproof vinyl plank installation focuses not just on laying planks correctly but on creating sealed, water-tight basins.

The Non-Negotiable Step: Perimeter Sealing

The single most important step in protecting floor systems is sealing perimeters. After LVP installation, 100% silicone caulk must be applied in expansion gaps around entire room perimeters before baseboards or shoe molding are installed. This bead of silicone should also be applied around toilet flanges, shower or tub bases, and around kitchen islands or cabinets.

This creates barriers preventing surface water from flowing over floor edges and getting underneath. If pipes burst or tubs overflow, perimeter seals contain water on top of waterproof vinyl planks, giving time to clean it up before causing subfloor damage. Sealing vinyl plank flooring edges is not optional—it’s mandatory for any bathroom, laundry room, or kitchen installation.

Subfloor Preparation for Wet Rooms

Proper installation begins before the first plank is laid. Subfloors must be perfectly clean, dry, and flat. When installing luxury vinyl tile, installers must check for any subfloor unevenness, which can cause “gaps or lifts around edges.” These tiny gaps become water entry points. Grinding down high spots and using high-quality self-leveling compounds to fill low spots is crucial. For basement installations or concrete slabs, using quality luxury vinyl underlayment for moisture or vapor barriers can be essential in preventing mold under LVP flooring.

Click-Lock vs. Glue-Down LVP in Wet Areas

The installation method also plays a role. Click-lock systems are popular for DIY installations because they’re relatively easy. However, glue-down LVP, when professionally installed using waterproof adhesive, can create more formidable barriers against water infiltration through seams. The adhesive itself acts as additional sealant. For commercial-grade waterproof LVP applications or areas with very heavy water exposure, glue-down installation is often the superior choice.

Comparing LVP to Other Waterproof Flooring

LVP vs. Sheet Vinyl

Sheet vinyl is technically the most waterproof flooring for bathrooms that isn’t tile. Why? It comes down to seams. The critical difference is that luxury vinyl planks and tiles have “many seams,” whereas sheet vinyl often has “fewer seams” or even none at all in smaller rooms. Fewer seams mean fewer potential points of failure for water penetration. While modern LVP offers far more realistic wood and stone looks, if your absolute top priority is creating completely impervious surfaces in utility spaces like laundry rooms, sheet vinyl remains an excellent choice.

LVP vs. Porcelain Tile

Porcelain tile with properly sealed grout joints creates genuinely waterproof surfaces. It’s arguably the gold standard for wet room durability. However, tile is also harder, colder underfoot, and more unforgiving when dishes or glassware are dropped. Installation is also significantly more labor-intensive and expensive. LVP offers a compelling middle ground: it’s warmer, softer, more affordable, and provides excellent performance when installed correctly.

Key Decision Factors

Material Properties vs. System Water-Tightness

The LVP plank itself is 100% waterproof. The system, however, is only as water-tight as its installation. This is the most important distinction to understand. Thinking about your floor as a complete system is crucial for success in kitchens, bathrooms, and basements.

Installation Method and Complexity

Click-lock LVP is designed to be DIY-friendly. However, DIY renovators might not know the critical importance of subfloor leveling or perimeter sealing, which can lead to failure. Professional installation costs more upfront but ensures these vital steps are done correctly, effectively “waterproofing” the system and protecting your investment.

Number and Vulnerability of Seams

LVP has seams at every plank edge. Sheet vinyl may have none. Tile has grout seams that must be sealed. The more seams a floor has, the more potential entry points for water exist, elevating the importance of perfect installation.

Durability Against Daily Wear

LVP’s protective wear layer offers exceptional durability against daily life. Look for at least 12-mil for residential use, and 20-mil or higher for homes with heavy traffic, pets, and kids. This layer also provides stain resistance, making it easy to handle kitchen spills.

Common Questions Answered

Is LVP flooring good for bathrooms and kitchens?
Absolutely. It’s an excellent choice for these rooms due to its durability, comfort, and waterproof material. The key is ensuring installation is done correctly with a sealed perimeter to protect subfloors, especially in full baths or around appliances.

Can water seep through LVP flooring?
Yes, water can and will seep through seams between planks if left to stand for prolonged periods. Quick spills are not an issue, but leaks and floods are serious threats to subfloors if systems aren’t sealed.

Are LVP recommended for laundry rooms?
Yes, luxury vinyl plank in laundry rooms is fantastic. It withstands moisture and potential leaks from washing machines far better than laminate or wood. Like bathrooms, sealed perimeter installations are highly recommended for maximum protection.

What is the most waterproof flooring for a bathroom?
Technically, porcelain or ceramic tile with epoxy grout is the most waterproof option available. Single-piece sheet vinyl with no seams is a close second. Professionally installed LVP systems with fully sealed perimeters are very close thirds and offer superior aesthetics and comfort for many homeowners.

Choosing Based on Your Situation

DIY Renovators

You’re focused on budget and the satisfaction of doing work yourself. Click-lock LVP is perfect. However, you must move beyond basic installation instructions. Don’t skip subfloor prep. Invest in good levelers. Most importantly, learn proper techniques for sealing entire perimeters and all fixtures with high-quality silicone caulk. This single step will elevate your project from “water-resistant” to truly waterproof floor systems and protect your hard work.

Busy Families

Your floor needs to be bomb-proof, withstanding spills from kids, pet accidents, and general family chaos. Peace of mind from professional installation is invaluable. Prioritize high-quality LVP with thick (20-mil+) wear layers and rigid cores (SPC is often denser and more dent-resistant). Insist that your installer details their process for sealing perimeters and fixtures to guarantee no weak points for water to exploit.

Design-Focused Homeowners

You desire warm, sophisticated looks of hardwood or natural stone in kitchens and primary bathrooms, but need waterproof material performance. LVP offers stunningly realistic visuals that tile often cannot match for wood looks. Your priority is protecting long-term investments. View professional installation not as a cost, but as insurance. Flawless installation ensures that plumbing leaks five years from now won’t destroy your subfloor and beautiful floors along with it.

While LVP planks are marvels of modern flooring technology, creating truly waterproof floors is a craft that depends on attention to detail. Understanding the critical role of sealed systems is the key to enjoying beautiful, worry-free floors for years to come.

Filed Under: Uncategorized

What It Really Costs to Install LVP Flooring in a 3-Bedroom Santa Cruz House

February 7, 2026 by Dan Versman

The true cost to install luxury vinyl plank (LVP) flooring in a typical 3-bedroom Santa Cruz house, around 1,200 sq ft, ranges from $9,000 for a budget-conscious project to over $25,000 for a luxury overhaul. Unlike generic online calculators, this price reflects Santa Cruz’s unique cost multipliers: a high-premium labor market, complex coastal subfloor conditions, and regional material pricing that significantly exceed national averages.

Why Online Calculators Fall Short

National figures paint one picture. For standard vinyl plank flooring projects, material costs typically run $2 to $7 per square foot, while premium luxury vinyl planks range from $3 to $10 per square foot. When adding labor, professional installation nationally adds another $3 to $10 per square foot.

This suggests a 1,000 square foot project could cost between $5,000 and $17,000 based on national averages. While helpful starting points, these numbers can be dangerously misleading for Santa Cruz homeowners. Local conditions create a completely different financial equation.

National vs. Santa Cruz Comparison

National average model:

  • Labor: $3-$10 per sq ft
  • Materials (LVP): $3-$10 per sq ft
  • Subfloor prep: Minimal, often just cleaning
  • Assumptions: Newer construction, stable climate, easy access to materials

Santa Cruz reality:

  • Labor: $5-$14+ per sq ft (reflecting the ‘Santa Cruz Premium’)
  • Materials (LVP): $4-$12+ per sq ft (regional supplier pricing and logistics)
  • Subfloor prep: Assumed necessary and significant, especially in older coastal homes
  • Assumptions: High cost of living driving labor rates, coastal moisture impacting subfloors, housing stock including many older, structurally complex homes

Understanding the Santa Cruz Labor Premium

Labor figures are consistently higher in Santa Cruz County. Local labor rates run 20-40% higher than online calculators suggest. Labor-only costs to install LVP in Santa Cruz can easily be the biggest budget component.

Contributing Factors

High cost of living: Santa Cruz ranks among the country’s most expensive places to live. Retaining skilled, professional LVP installers requires paying living wages reflecting this reality, directly translating to higher flooring installation costs per hour in California’s coastal hubs.

Demand for skilled tradespeople: Immense demand exists for qualified, licensed flooring contractors. From Scotts Valley remodels to Capitola new builds, the pool of experienced, reliable professionals is finite, driving up expertise prices.

Logistics and operations: Business costs from commercial vehicle insurance to fuel and local landfill disposal fees are higher in Santa Cruz. These operational costs factor into final bills.

While national average labor costs to install LVP flooring might top out around $10 per square foot, Santa Cruz flooring installation quotes commonly show labor components starting at $5 for basic click-lock vinyl and climbing to $14 or more for complex jobs involving glue-down installation or intricate layouts.

Coastal Subfloor Complexities

Subfloor preparation is often a minor step elsewhere. Here, it’s critical and frequently expensive. The age and coastal proximity of many Santa Cruz homes introduce variables that can dramatically inflate subfloor preparation costs.

Common Local Issues

Uneven or settled foundations: Older homes, especially those with pier-and-beam foundations common in neighborhoods like Seabright, often have floors settled over decades. Costs to level floors before LVP installation range from hundreds for spot-patching to thousands for full self-leveling compound layers.

Moisture intrusion: Persistent coastal fog and humidity lead to moisture issues in crawl spaces and on concrete slabs. Professional installers always conduct moisture testing. Installing proper moisture barriers is non-negotiable and adds to materials and labor costs.

Previous flooring layers: Multiple layers of old flooring are common. Nationally, flooring removal and disposal costs average $1 to $2 per square foot, but this increases with multiple or difficult-to-remove layers like old linoleum or mortared tile.

Vinyl plank flooring, even waterproof LVP, requires flat, stable, dry subfloors to perform correctly. Any imperfections eventually transfer through planks, causing separation, buckling, or squeaking. Failing to address subfloor issues is the number one cause of flooring failure.

Three Budget Scenarios for 1,200 Sq Ft

Budget-Conscious Refresh ($11,300)

This scenario focuses on clean, updated looks with cost-effective materials—great for rental properties or quick cosmetic upgrades.

Specifications:

  • LVP material: Entry-level 4-5mm thick click-lock planks ($3.50/sq ft)
  • Subfloor prep: Minimal, assuming relatively flat subfloors; includes old carpet removal
  • Labor: Standard installation for floating floors ($5.50/sq ft)
  • Extras: Re-installing existing baseboards

Cost breakdown:

  • Materials: 1,200 sq ft × $3.50 = $4,200
  • Labor & prep: 1,200 sq ft × $5.50 = $6,600
  • Disposal & supplies: ~$500
  • Total: $11,300

Mid-Range Upgrade ($18,400)

The most common project for local homeowners. Involves durable, waterproof core LVP products and addresses common subfloor issues for lasting results. Ideal for pet-friendly installations.

Specifications:

  • LVP material: High-quality 6-8mm thick waterproof core LVP with attached underlayment ($6.00/sq ft)
  • Subfloor prep: Old flooring removal, minor leveling, and patching
  • Labor: Professional installation, including undercutting door jambs for clean finishes ($7.50/sq ft)
  • Extras: New basic baseboard installation

Cost breakdown:

  • Materials: 1,200 sq ft × $6.00 = $7,200
  • Labor & prep: 1,200 sq ft × $7.50 = $9,000
  • New baseboards (material & labor): ~$1,500
  • Disposal & supplies: ~$700
  • Total: $18,400

Luxury Overhaul ($27,500+)

Full-service flooring installation for homeowners wanting premium materials and flawless finishes, common in high-end renovations.

Specifications:

  • LVP material: Top-tier, wide-plank, glue-down LVP with thick wear layers and realistic texture ($9.00/sq ft)
  • Subfloor prep: Extensive work including full flood coat of self-leveling compound and premium moisture barrier
  • Labor: Meticulous glue-down installation, more time-consuming and requiring higher skill levels ($11.00/sq ft)
  • Extras: Furniture moving, custom baseboard installation, potentially stair installation

Cost breakdown:

  • Materials: 1,200 sq ft × $9.00 = $10,800
  • Labor & prep: 1,200 sq ft × $11.00 = $13,200
  • New custom baseboards: ~$2,500
  • Stairs (if applicable): ~$1,500-$3,000 extra
  • Disposal & supplies: ~$1,000
  • Total: $27,500+

Local Suppliers vs. Big Box Stores

Big box stores: Offer convenience and attractive entry-level pricing. However, they typically use subcontracted installation services. While initial per-square-foot prices might seem low, costs for preparation, removal, and deviations from “perfectly standard” installations add up quickly. Installation quality depends entirely on specific subcontractors assigned.

Local flooring companies: Provide more integrated, expert experiences. Staff are specialists understanding specific local home challenges. They curate higher-quality LVP options proven to perform well in coastal climates and work with in-house or dedicated crews. While initial quotes might seem higher, they’re often more comprehensive, leading to fewer surprise costs.

Common Questions Answered

How much does LVP cost for a 2,000 sq ft house?
Budget-conscious projects start around $18,000-$19,000. Mid-range upgrades run $30,000-$32,000. Luxury overhauls easily exceed $45,000, especially with significant subfloor work.

How long does installation take?
For 1,200 sq ft homes, the entire process takes 3 to 7 days: one day for demolition and preparation, 2-4 days for installation (depending on complexity), and a final day for baseboards and cleanup. Duration depends heavily on subfloor preparation requirements.

Does installation cost include underlayment?
It depends. Many modern LVP products come with pre-attached underlayment pads. For those that don’t, or for concrete subfloors requiring moisture barriers, underlayment is a separate material cost. Always clarify this when getting estimates.

What about stair installation?
Stairs are specialized, labor-intensive tasks. Installers charge per stair, typically $100 to $250 per tread, depending on complexity (e.g., open-sided stairs, custom nosing). This cost is almost always separate from per-square-foot flooring prices.

Choosing Your Approach

Budget-Conscious Local Homeowners

Focus on mid-range LVP products (6mm thick with 12-20 mil wear layers) from local suppliers who might offer clearance or special deals. Be hands-on with prep work if able—handling demolition or painting your own baseboards saves hundreds. Prioritize multiple, detailed quotes from licensed local contractors over big box stores for better overall value and more reliable installation.

Remote Vacation Property Owners

Owning rentals or second homes in Aptos, Capitola, or Santa Cruz requires durable, waterproof, low-maintenance solutions managed with minimal oversight. Full-service flooring installation from reputable local companies is paramount. Choose high-quality waterproof core LVP handling sandy feet and potential tenant misuse. Slightly higher costs for trusted local installers managing projects from start to finish—including furniture moving and cleanup—provide peace of mind.

Quality-Focused Renovators in Older Coastal Homes

Don’t cut corners on subfloor preparation. Budget significantly for leveling and moisture mitigation. Invest in premium glue-down LVP products offering superior stability and more solid feel underfoot. Find professionals known for meticulous work with older, imperfect homes. Higher LVP flooring installation costs invest in floors becoming permanent, high-quality home features.

Understanding the true cost to install LVP flooring in 3-bedroom Santa Cruz houses means looking past national averages and focusing on unique local factors. Thorough assessments from experienced professionals are the only way to get truly accurate investment pictures.

Filed Under: Uncategorized

How Long Does Hardwood Floor Installation Actually Take?

January 30, 2026 by Dan Versman

The honest answer: longer than most people expect. While the physical installation typically takes 1-3 days, the complete process including acclimation before and curing after spans 2-5 weeks when done properly.

Understanding this full timeline prevents frustration and protects your investment. At Warehouse Direct Flooring Outlet, we’ve been installing hardwood floors since 1986, and we’ve learned that rushing any phase leads to problems. Here’s what a realistic timeline looks like, phase by phase.

Phase 1: Consultation and Measurement (1-3 Days)

Before anything else, you need accurate measurements and a clear plan. We can typically schedule your free in-home measure within 48 hours of your call. During this visit, we’ll:

  • Measure your space accurately
  • Check subfloor type and condition
  • Test moisture levels
  • Discuss product options, timelines, and any concerns

Once you’ve selected your hardwood and approved the estimate, we’ll schedule delivery and installation usually within 1-4 weeks depending on product availability and our schedule.

Phase 2: Acclimation (3-14 Days Before Installation)

This is the step most people don’t know about and the one that matters most for long-term performance.

Wood is hygroscopic, meaning it absorbs and releases moisture from surrounding air. New hardwood needs to sit inside your home, in the rooms where it will be installed, until its moisture content equalizes with your living environment.

Why this matters: Wood installed before it acclimates will continue adjusting after installation. In humid conditions, it swells causing buckling and cupping. In dry conditions, it shrinks creating gaps between boards. Either way, you’re looking at expensive repairs within a year or two.

Typical acclimation times:

  • Engineered hardwood: 3-5 days minimum
  • Solid hardwood: 7-14 days, especially in humid coastal environments

We deliver your flooring early, open the boxes, and let the wood reach equilibrium with your home’s temperature and humidity. This isn’t optional it’s the foundation of an installation that lasts.

Phase 3: Subfloor Preparation (1-3 Days)

With acclimation complete, installation begins with removing old flooring and preparing what’s underneath.

Old flooring removal varies by material. Carpet comes up in hours. Tile or glued-down wood can add a full day or more.

Subfloor inspection and prep is where we often find surprises. Successful hardwood installation requires a subfloor that’s clean, flat, and dry. We’re looking for:

  • Flatness: No more than 3/16″ variation over 10 feet for solid hardwood. Dips or high spots create squeaks and uneven wear.
  • Moisture levels: We test with professional meters. If readings are too high, we need to find and fix the source before proceeding sometimes uncovering hidden leaks or crawlspace issues.
  • Structural integrity: Loose panels, damaged areas, or prior water damage all get addressed before any hardwood goes down.

This phase can take a few hours or several days depending on what we find. It’s also the primary source of unexpected delays but skipping it guarantees problems later.

Phase 4: Installation (1-3 Days)

This is the part most people picture when they think “hardwood installation.” Professional crews typically lay 500-1,000 square feet per day, depending on:

Installation method. Nail-down over plywood is generally fastest. Glue-down applications take longer due to careful adhesive work. Floating installations fall somewhere in between.

Product type. Prefinished hardwood is faster since there’s no sanding or finishing on-site. Unfinished hardwood requires additional days for the finishing process.

Room complexity. Open, rectangular rooms go quickly. Closets, angles, stairs, and intricate patterns slow things down. Herringbone or custom designs can double labor time.

For a typical 1,000 square foot project with prefinished hardwood, expect 2-3 days of installation work.

Phase 5: Site Finishing (3-5 Days for Unfinished Hardwood)

If you’ve chosen unfinished hardwood for a custom stain color or seamless look, add time for on-site finishing:

  • Sanding: 1-2 days of progressively finer sanding for a perfectly smooth surface
  • Staining: 1 day, plus drying time (8-24 hours depending on product)
  • Sealing: 2-3 days for multiple polyurethane coats, with 24 hours between each

Prefinished hardwood skips this entire phase—the finish is factory-applied and ready to walk on much sooner.

Phase 6: Curing (1-30 Days After Installation)

Your floors might look done, but the finish isn’t fully hardened yet. “Dry to the touch” and “fully cured” are very different things.

24 hours: Walk in socks only. No shoes, no pets.

3-7 days: Begin moving furniture back carefully. Lift and place—never drag. Use felt pads on all legs.

2 weeks: Finish is mostly cured but still scratches more easily than it will later.

30 days: Finish reaches full hardness. Now you can place area rugs (which can trap solvents and damage uncured finish) and resume normal cleaning routines.

This patience pays off for years. Rushing the curing phase is the fastest way to damage floors you just invested in.

Putting It All Together: Realistic Timeline Examples

Prefinished engineered hardwood, 500 sq ft, good subfloor:

  • Acclimation: 3-5 days
  • Subfloor prep + installation: 1-2 days
  • Light use in 24-48 hours, full cure in 2 weeks
  • Total: About 2 weeks start to finish

Solid hardwood, 1,000 sq ft, needs subfloor work:

  • Acclimation: 7-14 days
  • Subfloor prep: 1-2 days
  • Installation: 2-3 days
  • Curing: 1-4 weeks for full hardness
  • Total: 3-5 weeks start to finish

Unfinished hardwood with custom stain, 800 sq ft:

  • Acclimation: 7-14 days
  • Subfloor prep + installation: 2-3 days
  • Sanding, staining, finishing: 4-5 days
  • Full curing: 30 days

– Total: 4-6 weeks start to finish

Get Your Project Timeline

Every project is different. Your timeline depends on product choice, subfloor condition, room complexity, and finish type. During your free consultation, we’ll walk through exactly what to expect – no surprises.

We’ve been doing this for nearly 40 years, and our in-house crews know how to work efficiently without cutting corners on the steps that matter. Learn more about our hardwood floor installation process, or schedule your consultation to get a realistic timeline for your specific project.

Schedule Your Free In-Home Consultation | Call (831) 429-8221

Filed Under: Uncategorized

Engineered vs. Solid Hardwood: Which Is Right for Coastal Homes?

January 15, 2026 by Dan Versman

Trying to decide between engineered and solid hardwood for a home near the coast? The short answer: engineered hardwood usually performs better in coastal climates due to its dimensional stability. But the full picture involves understanding why and knowing when solid hardwood still makes sense.

At Warehouse Direct Flooring Outlet, we’ve been installing both solid and engineered hardwood in coastal homes since 1986. As the only Bona and NWFA Certified flooring retailer in Santa Cruz, we’ve seen what lasts and what fails in our fog, humidity, and salt air. Here’s what nearly 40 years of experience has taught us.

Why Coastal Climates Are Hard on Hardwood

The word “moisture” undersells what coastal hardwood floors actually face. There are three distinct challenges:

Humidity swings. Marine layers create significant daily humidity fluctuations. Wood is hygroscopic it absorbs and releases moisture to match the surrounding air, expanding and contracting constantly. For solid hardwood, this movement creates gaps between boards in dry periods and cupping (edges rising higher than centers) when humidity spikes.

Intense UV exposure. Those sun-drenched rooms you love? They’re slowly bleaching your floors. Prolonged UV exposure fades wood color, especially near large windows and glass doors. Some species are more photosensitive than others dark floors can become washed out and uneven over time.

Airborne salt. Coastal air carries microscopic salt particles from ocean spray. This settles on floors and gradually degrades protective finishes, leaving them dull and compromising their ability to protect the wood beneath.

Any hardwood floor in a coastal home needs to handle all three. That’s where construction method matters.

How Solid and Engineered Hardwood Differ

Solid hardwood is milled from a single piece of lumber. It’s beautiful, traditional, and can be refinished 6-8 times over its lifespan. But that single-piece construction is also its weakness near the coast there’s nothing restricting the wood’s natural expansion and contraction with humidity changes.

Engineered hardwood features a real hardwood top layer (the wear layer) bonded to multiple core layers, each oriented in different directions. This cross-ply construction is the key: when the top layer wants to expand, the underlying layers with opposing grain restrict that movement.

The result is significantly better dimensional stability—fewer gaps, less cupping, and more consistent performance through seasonal humidity swings. This stability also makes engineered hardwood the better choice for installation over concrete slabs, which are common in many coastal homes.

When Engineered Hardwood Is the Better Choice

For most coastal installations, we recommend engineered hardwood. Here’s why:

Ground-floor and slab installations. Concrete can wick moisture up from below. Engineered hardwood’s stable core handles this better than solid wood, which can cup or buckle when moisture migrates through the slab.

Rooms with large windows or glass doors. High UV exposure combined with temperature swings from direct sunlight makes dimensional stability even more important. Quality engineered hardwood with factory-applied UV-cured finishes handles this environment well.

Open floor plans with varying microclimates. When your kitchen, living room, and sunroom are all connected, humidity and temperature vary throughout the space. Engineered hardwood tolerates these inconsistencies better.

Wide plank installations. Wider boards experience more pronounced expansion and contraction. Engineered construction minimizes this movement, making wide planks practical in coastal homes where solid wide planks would be risky.

When Solid Hardwood Still Makes Sense

Solid hardwood isn’t wrong for coastal homes—it just requires the right conditions:

Upper floors with good climate control. Away from ground moisture and with consistent HVAC, solid hardwood performs well. Many of our clients choose solid hardwood for second-floor bedrooms and hallways.

Historic home restoration. If you’re matching existing old-growth floors or preserving original character, solid hardwood is often the right choice. We can help you select species and cuts that complement what’s already there.

Homeowners who prioritize refinishing options. Solid hardwood can be sanded and refinished more times than engineered (6-8 times vs. 1-3 times for engineered, depending on wear layer thickness). If you’re planning to stay in your home for decades and want maximum refinishing flexibility, that matters.

The key with solid hardwood in coastal areas is proper acclimation, correct installation methods, and realistic expectations about seasonal movement.

What to Look for in Quality Engineered Hardwood

Not all engineered hardwood is equal. For coastal performance, prioritize:

Wear layer thickness. Look for 3mm or thicker. This determines how many times the floor can be refinished and affects long-term durability. Thin wear layers (under 2mm) can’t be refinished at all.

Stable species. European White Oak, particularly rift and quarter sawn, offers tight grain structure and natural dimensional stability. Its high tannin content also provides natural moisture and pest resistance.

Quality finishes. Factory-applied UV-cured finishes with aluminum oxide outperform site-applied polyurethane for scratch resistance, UV protection, and durability against salt air degradation.

We carry engineered hardwood from manufacturers like Monarch Plank, Diamond W, and Somerset that meet these standards. You can browse options on our hardwood flooring page.

How to Decide: Get Expert Input

Here’s our honest advice after installing hardwood in coastal homes for nearly 40 years:

Don’t guess. Your specific rooms, subfloor type, sun exposure, and lifestyle all factor into the right choice. What works in your neighbor’s house might not be ideal for yours.

Think about the whole system. The best results come from matching the right product (solid vs. engineered, species, finish) with proper installation methods (acclimation, moisture testing, correct fastening). We handle both.

Consider your timeline. Planning to sell in a few years? Engineered hardwood offers great value and performance. Staying forever and want maximum refinishing flexibility? Solid might make sense in the right locations.

Not sure which direction is right for your home? We’ll assess your space, check moisture levels, discuss your priorities, and give you a straight recommendation.

Schedule Your Free In-Home Consultation | Call (831) 429-8221

Whether you choose solid or engineered, our professional hardwood installation ensures your floors are built to handle coastal living for decades to come.

Filed Under: Uncategorized

Refinish or Replace Your Old Hardwood Floors? A Homeowner’s Guide

January 8, 2026 by Dan Versman

Staring at worn, scratched, or water-stained hardwood floors and wondering whether to refinish or replace them? For most homeowners with older properties, refinishing costs significantly less and preserves more value than full replacement. But coastal moisture damage, structural issues, or floors that have been sanded too many times can change that equation.

At Warehouse Direct Flooring Outlet, we’ve been helping homeowners make this decision for nearly 40 years. As the only Bona and NWFA Certified flooring store in Santa Cruz, we handle both hardwood refinishing and new hardwood installation so we’ll give you an honest assessment, not a sales pitch for whichever service pays us more.

Here’s how to decide.

Why Older Hardwood Floors Are Worth Saving

Many homes built before the 1950s feature flooring milled from old-growth lumber—typically Douglas fir or oak. This isn’t the same wood you’ll find in stores today.

Old-growth trees grew for hundreds of years, producing wood with superior density, tighter grain patterns, and richer color than modern new-growth lumber. That tight grain means better dimensional stability, which is why these floors have already survived decades of foggy summers and seasonal humidity swings.

Since old-growth forests have largely disappeared, this lumber is irreplaceable. Professional refinishing can revive this material beautifully, preserving character and patina that new flooring can only imitate.

How to Assess Your Floor’s Condition

Before deciding, you need an honest evaluation of what you’re working with. Here’s what to look for:

Surface damage like scratches, wear patterns, and minor staining can almost always be sanded out and refinished. This is normal wear that refinishing handles easily.

Moisture indicators require closer attention:

  • Dark spots or discoloration
  • Cupping (board edges higher than centers)
  • Crowning (board centers higher than edges)
  • Soft or springy spots when you walk

These issues commonly appear in rooms with poor ventilation or near windows exposed to coastal air. Localized problems can often be addressed during refinishing—*if* the underlying moisture source has been fixed.

The 30% rule: If more than 30% of your floor shows significant damage—widespread cupping, subfloor rot, or pest damage—replacement typically becomes the better investment. A few dark spots or minor seasonal gaps? Refinishing handles that. But when damage is extensive, you’re paying to refinish floors that won’t perform well long-term.

Thickness check: Most solid hardwood can be refinished 6-8 times over its lifespan. If previous owners sanded floors multiple times, they may be too thin for another round. When the wood above the tongue-and-groove joint is thinner than a dime, you’ve likely reached the limit.

Cost Comparison: Refinishing vs. Replacement

Refinishing typically runs $3–$8 per square foot, depending on condition, stain choices, and finish type. For a typical project, expect $4,000–$10,000. Modern dustless sanding systems make the process cleaner than you might expect.

Replacement with new hardwood runs $8–$18+ per square foot installed, plus removal and disposal of old flooring. If subfloor damage is discovered, costs climb further. Total replacement often runs 2-3x the cost of refinishing.

For most floors in reasonable condition, refinishing delivers far better ROI—especially when selling. Beautifully restored original hardwood becomes a selling point that distinguishes your property. Generic new flooring looks fine, but it lacks the character buyers notice and pay premiums for.

When Replacement Makes More Sense

Sometimes refinishing isn’t the right answer. Here’s when we recommend new hardwood installation instead:

Structural damage beyond the surface. When rot extends into the subfloor, or pest damage has compromised integrity, refinishing is just cosmetic. Full replacement ensures your floors are safe and sound.

Floors too thin to sand. If multiple previous refinishes have worn boards too thin, another sanding risks exposing nails or destroying the tongue-and-groove system. At that point, replacement is your only durable option.

Major additions or layout changes. Matching new hardwood to 80-year-old flooring is extremely difficult and expensive. When you’re adding significant square footage, starting fresh with consistent flooring throughout sometimes makes more sense.

Extensive moisture damage. If coastal humidity, plumbing leaks, or poor drainage have damaged more than 30% of your floors, replacement with properly acclimated new hardwood—installed with correct moisture barriers—gives you a floor built to last another 50 years.

How to Decide: Get an Honest Assessment

Here’s our advice after nearly four decades of flooring work:

Start with a professional evaluation. Don’t guess. Have an experienced flooring professional assess your floors’ actual condition—thickness, moisture levels, subfloor integrity. This takes the guesswork out of the decision.

Fix moisture problems first. Whether you refinish or replace, addressing the source of any water intrusion is essential. New finish or new floors won’t survive ongoing moisture issues.

Consider your timeline. Refinishing is faster and less disruptive. Replacement requires more time for removal, subfloor prep, acclimation, and installation. If you’re selling soon, refinishing usually makes more sense.

Think long-term. When you work with a company that’s been here for 40 years, you’re not just getting today’s project done—you’re getting a partner who can refinish those same floors again in 10-15 years, or help you add matching hardwood to future additions.

Get a Free Assessment

Not sure which direction makes sense for your floors? We’ll come out, evaluate the condition, check thickness and moisture levels, and give you an honest recommendation—even if that means telling you refinishing is all you need.

No pressure. No sales games. Just straightforward advice from people who’ve been doing this since 1986.

Schedule Your Free In-Home Assessment | Call (831) 429-8221

Filed Under: Uncategorized

Why a Standard Carpet Pre-Installation Checklist Is a Hazard for Your Home

December 5, 2025 by Dan Versman

For Santa Cruz homeowners, preparing for new carpet installation involves more than just moving furniture. A generic online checklist is dangerously incomplete for our unique coastal environment, which is why choosing an experienced Santa Cruz carpet installer is essential. A successful installation that withstands Monterey Bay’s humidity, pervasive sand, and protects our distinct local architecture requires a regionally specific approach. This pre-installation guide will help you navigate the process and ensure your investment lasts for years to come.

Standard Prep vs. Coastal Reality

Most online guides give you the basics: clear the room, vacuum, and wait. But in Santa Cruz County, from the foggy Westside bluffs to sun-drenched Aptos hills, that advice can lead to musty odors, premature wear, and even damage to your home. Here’s how standard preparation falls short and why a localized approach is critical for long-term carpet durability.

Standard Carpet Preparation

This approach typically involves just clearing rooms of furniture and personal items, and a quick pass with a household vacuum. It assumes dry, stable indoor environments and modern, uniform subfloors. It’s a one-size-fits-all solution that works in many places, but not here.

Santa Cruz-Specific Preparation

This is a more nuanced process. It includes a deep “sand purge,” thorough subfloor moisture checks, special considerations for historic architecture, and strategic ventilation plans. This home preparation for new flooring is designed to proactively address environmental challenges unique to our area, ensuring the right foundation for your new carpet.

The Long-Term Difference

Standard prep can leave your new carpet vulnerable to abrasive sand grinding away at fibers and trapped moisture fostering mold. The Santa Cruz-specific method protects your investment from the start, leading to a healthier home, better air quality, and carpet that looks new for much longer.

The Pre-Installation Sand Purge: Beyond the Vacuum

We all live with it: that fine, persistent sand that finds its way from Seabright Beach to the Soquel mountains. A simple vacuum before installers arrive isn’t enough. Trapped deep in subfloor cracks and along baseboards, this sand acts like microscopic sandpaper. The fine quartz and feldspar particles found in Central Coast beach sand have a hardness of 7 on the Mohs scale, making them highly abrasive to common nylon carpet fibers, which can accelerate wear by up to 40% in high-traffic areas. This is a primary reason why carpets in coastal homes can look worn out years ahead of schedule.

Your Sand Purge Protocol

Step 1: The Deep Vacuum. After clearing the room, use a powerful vacuum with a crevice tool. Go over the entire subfloor, paying special attention to the perimeter where walls meet floors.

Step 2: The Shop-Vac Finish. If you have one, a shop-vac is invaluable. Its powerful suction can pull out deeply embedded sand that regular vacuums miss. This step is critical for a truly clean subfloor.

Step 3: The Damp Mop. A slightly damp (not wet) mop or cloth can pick up the last fine dust and sand particles. Ensure the subfloor is completely dry before installers arrive.

Coastal Fog & Your Subfloor: Preventing Future Musty Odors

Our famous coastal fog is beautiful, but it brings persistent dampness that can seep into your home’s structure. Laying new carpet and padding over a subfloor with high moisture content is a recipe for disaster, trapping dampness and creating breeding grounds for mold and mildew.

For coastal applications, industry standards recommend subfloor moisture content readings below 12% before installing carpet. Furthermore, in coastal zones with average relative humidity exceeding 60%, like Santa Cruz, using carpet pad without a moisture barrier can lead to measurable mold spore amplification within 18 months. This makes choosing the right padding as important as the carpet itself.

Homeowner’s Moisture-Check Protocol

Run a Dehumidifier: In the 48-72 hours before installation, run a dehumidifier in rooms getting new carpet. This helps pull ambient moisture out of the air and subfloor.

Ask for a Reading: Before they start, ask your professional installers to take a moisture reading of the subfloor. This is a standard part of quality installation processes. Don’t be afraid to ask questions before they start; a good team will be happy to show you the readings.

Choose the Right Padding: Discuss moisture-barrier padding with your flooring provider. Synthetic fiber or closed-cell rubber carpet padding offers superior resistance to moisture absorption compared to standard rebond padding, making it the recommended choice for environments prone to high humidity and temperature fluctuations.

Protecting Santa Cruz’s Historic Homes

From iconic Victorians on Walnut Avenue to charming Craftsman bungalows in Seabright, Santa Cruz is rich with architectural history. Preparing these homes requires a delicate touch. Standard tear-out methods can damage irreplaceable original features. A significant portion of homes built in Santa Cruz before 1950 feature redwood plank subfloors, which are softer than modern OSB or plywood and require specialized, less aggressive tack strip nails to prevent splitting and damage.

Special Considerations

Discuss Subfloors: If you know you have original hardwood or redwood plank subfloors, discuss this with your installation company beforehand. This ensures they bring the right tools and use correct techniques for subfloor repair before new carpet is laid.

Baseboard and Trim: For delicate, original, or high-profile trim, it’s often best to have it professionally removed before tear-out and reinstalled after new carpet is in. Discuss this option with your installers.

Protecting Walls: Inquire about how to protect walls during carpet installation. While professionals are careful, placing cardboard or protective film along the base of walls in tight hallways or on stairs can prevent scuffs from large, heavy rolls of carpet.

Planning for Healthier Air: Ventilation on Foggy Days

New carpet comes with an odor, often a mix of adhesives and volatile organic compounds (VOCs) from the manufacturing process. The standard advice is to “open the windows.” But on a damp, foggy Santa Cruz day, that can invite more moisture into your home.

Coordinate with your installers. The day before carpet installers arrive, set up box fans in windows facing outwards to help pull air out of the room. Keep interior doors open to promote airflow throughout the house. Maintaining a stable temperature is also helpful; a consistent 65-75°F is ideal for materials to acclimate and adhesives to set properly.

Key Factors for Your Flooring Decision

Prevention of Mold and Mildew

This is non-negotiable in our climate. Proper subfloor moisture testing and selection of moisture-barrier padding are your primary defenses against musty smells and unhealthy mold growth under your new carpet.

Protection Against Premature Wear

A thorough “sand purge” before installation is the only way to remove abrasive particles that will otherwise grind down your carpet fibers from below, leading to visible traffic patterns and shortened lifespan.

Preservation of Historic Architecture

Communicating with your installation team about original redwood subfloors, delicate trim, or plaster walls is crucial. Professional teams will adjust their methods, from the type of nails used to how they handle baseboards, to protect your home’s character.

Long-Term Value

By taking these Santa Cruz-specific steps, you’re not just preparing for installation; you’re investing in the longevity of your flooring. Properly prepared foundations ensure smooth installation processes and carpet that performs beautifully for its full expected life.

Common Installation Day Questions

What to do before carpet installation?
The most important responsibilities include completely clearing rooms of all furniture and fragile items, securing valuables before installers arrive, and performing the sand purge and moisture mitigation steps outlined above. Also, ensure there’s clear parking for the installation van—Santa Cruz streets can be tight.

How much do you tip the carpet installer?
Tipping is not required but is always appreciated for jobs well done. If the team was professional, efficient, and careful with your home, a tip of $10-$20 per installer is a common gesture of gratitude.

How long after carpet installation can you walk on it?
You can typically walk on your new carpet immediately. It’s best to use socks or clean shoes to avoid soiling new fibers right away.

How long should you wait before sleeping in a room with new carpet?
This depends on your sensitivity. While odors are generally not harmful, they can be unpleasant. Ventilating the room for 24 to 72 hours is recommended. If you or a family member has asthma or is sensitive to smells, you may want to wait 2-3 nights before sleeping in the room.

Making the Right Choice for Your Home

The Historic Homeowner

If you own a Victorian or Craftsman, your main concern is preserving the soul of your home. Your focus should be on communicating with installers about your original redwood or fir subfloors, requesting less-aggressive tack strips, and planning for careful removal and reinstallation of unique baseboards and trim. Subfloor moisture is still a concern, but architectural preservation is your top priority.

The West Cliff Beachfront Resident

For those living with constant ocean spray, the battle is against moisture and sand. Your preparation must be aggressive. A thorough sand purge is absolutely essential, as is running a dehumidifier for several days prior to installation. Your most important decision will be selecting high-quality carpet with robust moisture-barrier pads, like closed-cell rubber options. This is critical for preventing mold and ensuring your flooring investment survives the intense coastal environment.

The Scotts Valley Family

Living further from the immediate coast doesn’t mean you’re in the clear. Sand from trips to Manresa or Natural Bridges still finds its way home, and ambient humidity is a factor. Your approach can be more balanced. A diligent sand purge is still important for durability in high-traffic family homes. Focus on good ventilation practices to manage VOCs for your family’s health, and while a top-tier moisture barrier may not be as critical as on West Cliff, quality pads are still wise investments for longevity.

Ultimately, successful home carpet installation in Santa Cruz begins long before installers arrive. Taking these specific, localized steps will ensure smooth processes, protect your home’s unique character, and maximize the life and beauty of your new flooring.

Filed Under: Uncategorized

The Carpet Rule: Why You Need to Replace Your Carpet Sooner Than You Think

December 4, 2025 by Dan Versman

For high-traffic homes in Santa Cruz, the typical carpet replacement guideline of 5–15 years is often misleading. In reality, most carpets last closer to 5–8 years because of the coastal combination of abrasive sand, high humidity, and salt air. In this environment, timely carpet replacement and professional carpet installation services from Warehouse Direct are not just about appearance; they are crucial for your home’s health, value, and comfort.

Why Santa Cruz Carpets Age Faster

The Abrasive Power of Sand

Santa Cruz life means constant trips to the beach, trails, and outdoor adventures but all that fine sand from places like Natural Bridges and Seabright State Beach inevitably finds its way indoors. Unlike regular dirt, beach sand is sharp, crystalline, and grinds into carpet fibers with every step. This constant abrasion causes matting, crushed fibers, and visible wear patterns (especially in high-traffic paths and on stairs) much sooner than you’d expect. Even deep cleaning can’t reverse this microscopic damage, leading to dull and matted carpets that demand replacement years ahead of schedule.

Humidity and Moisture

Our famous coastal fog and persistent humidity accelerate carpet wear in ways most inland homes never experience. The carpet and carpet pad absorb airborne moisture, creating the perfect environment for mildew, mold, and musty odors deep within the fibers. This moisture also degrades the latex adhesives that hold the carpet backing together, causing bubbling or stretching (delamination) signs that call for immediate replacement. Once the pad or subfloor becomes contaminated, it’s a health risk, and professional cleaning is no longer enough.

When an Old Carpet Becomes a Health Hazard

Santa Cruz’s moist climate means carpets act as giant filters, trapping dust, pollen, sand, and mold spores, especially risky for allergy sufferers. Over time, frayed fibers and denser pile make it nearly impossible to vacuum out these irritants. If allergies persist even after professional cleaning, or you detect persistent musty odors, it’s a strong sign your carpet is overdue for replacement.

Local Carpet Lifespan: Santa Cruz vs. National Average

  • National guideline: Carpets last 5-15 years depending on quality, traffic, and care.
  • Santa Cruz reality: Even top-quality carpets in active households, especially with kids/pets, often show significant wear in 5-8 years.

Main living areas, stairs, and hallways are most affected. Coastal rentals or vacation properties may need new carpet even sooner due to frequent turnover and higher traffic.

Choosing the Right Material for the Coast

Given these conditions, smart Santa Cruz homeowners skip plush carpets and natural fibers like wool (which absorbs moisture) in favor of high-performance synthetics. Solution-dyed nylon and Triexta (SmartStrand) are top choices because they resist moisture and stains while maintaining color throughout the entire fiber, making them far more durable against sand and salt. Pairing these high-density, low-pile carpets with a moisture-barrier pad extends their lifespan and simplifies maintenance.

When Should You Replace Your Carpet?

  • 20+ years old: No matter the fiber, it’s time. Fibers, padding, and backing are past their usable lifespan and are often harboring allergens and moisture.
  • Visible wear: Matting in walkways, rippling, bubbling, or shiny, flat patches are signs that wear has gone beyond what professional cleaning can fix.
  • Persistent odors or allergies: If smells linger despite cleaning, or allergy symptoms don’t improve, the carpet is trapping mold, mildew, or dust that can’t be removed.

Advice for Santa Cruz Homeowners and Landlords

  • Families near the beach: Expect quicker replacement cycles, especially if you have kids and pets. Choose durable, moisture-resistant materials and colors that can hide sand.
  • Rental property owners: Use commercial-grade, low-pile, solution-dyed nylon to withstand rapid turnover and rough use. Budget for more frequent replacement; it protects property value and tenant health.
  • Health-conscious residents: Low-VOC carpets with moisture barriers prevent mold and are best for indoor air quality in our climate.

Final Word

The “Santa Cruz Carpet Rule” is simple: plan to replace your carpets more often than national averages suggest. Watch for early signs of wear, odors, or allergy symptoms, especially in high-traffic areas and rental units. Upgrading to coastal-ready materials and investing in high-quality installation helps ensure your home stays clean, comfortable, and healthy despite the relentless beach lifestyle. For an accurate assessment and a no-obligation quote from experts who understand the unique needs of Santa Cruz properties, connect with Warehouse Direct, your trusted local flooring store or installer.

Filed Under: Uncategorized

Why the Best Carpet for Pets and Kids Isn’t What You Think

December 3, 2025 by Dan Versman

For Santa Cruz families with active kids and pets, choosing the right carpet involves more than just picking a color and hoping it resists stains. The best carpet must withstand a unique set of coastal challenges. It’s not just about spills; it’s a battle against the abrasive sand from Seacliff State Beach, the persistent humidity rolling in with the fog, and the constant traffic from an indoor-outdoor lifestyle. The ideal carpet install service combines durable fibers, intelligent construction, and moisture-wicking properties to ensure your flooring looks great for years, not just months.

Beyond Stains: Sand Is Your Carpet’s Biggest Enemy

We all worry about grape juice spills and muddy paw prints. But in Santa Cruz County, the most significant threat to your carpet’s longevity is microscopic and relentless: sand. Those tiny, sharp-edged silica particles brought home from Natural Bridges or walks along West Cliff Drive act like sandpaper on your carpet fibers. Every time someone walks across the room, those grains grind away at the yarn, severing fibers and causing them to look dull, frayed, and matted over time. This is premature wear, and no amount of spot cleaning can fix it.

The High-Density Solution

This is where understanding carpet construction becomes crucial. The answer isn’t plush, deep pile that feels luxurious at first. That type of carpet is a trap for sand, allowing it to sink deep where vacuums can’t reach. Instead, the solution is high-density, low-pile carpet. Dense construction means fibers are packed tightly together, creating strong, resilient surfaces that prevent sand from burrowing in. Low-pile carpets are much easier to clean, as dirt and debris stay on surfaces rather than getting embedded deep within fibers. This makes your vacuuming far more effective, protecting your investment. For high-traffic family rooms and stairs, choosing wear-resistant carpet with this build is non-negotiable for busy homes.

The Humidity Factor: Fighting Moisture and Odors

Living anywhere from the Santa Cruz Mountains down to the coast means dealing with marine layers and high humidity. While great for redwoods, this moisture can be detrimental to your home’s interior, especially carpeting. Trapped moisture is a breeding ground for mildew, mold, and unpleasant, musty odors. When you add pet accidents to the mix, that moisture can activate bacteria in carpet pads, leading to lingering smells impossible to remove.

Why Fiber Material Is Critical

This is why fiber material matters so much. Natural fibers like wool, while beautiful, are absorbent and can be problematic in our damp climate. Instead, homeowners should look to advanced synthetic fibers. Synthetic fibers like nylon, polyester, and olefin are all great choices for carpet installation in humid climates as they are not prone to mold and mildew growth. They don’t absorb moisture, which is the first line of defense.

The second is choosing the best carpet padding for pet urine and general moisture. A specialized moisture-barrier pad, often called spill-proof pad, acts as a waterproof layer between carpet and subfloor. If a spill or pet accident occurs, it won’t soak into the pad and subfloor, making cleanup complete and preventing the growth of odor-causing bacteria. For any home with pets, an odor-resistant carpet system starts with the right pad.

Deep Dive Into Pet and Kid-Friendly Carpet Fibers

Understanding different types of carpet fibers is key to knowing how to choose carpet for homes with pets and kids. The choice you make will directly impact durability, stain resistance, and long-term appearance.

Nylon: The Resilience Champion

For sheer durability, nylon is the undisputed king. It’s an ideal choice for the most active families, especially for stairs and main living areas seeing constant foot traffic. Its primary strength lies in its resilience—the ability to bounce back from being crushed. Nylon 6,6 is the strongest fiber type, which makes it the most resilient, allowing it to bounce back from crushing and matting from heavy foot traffic. This means nylon carpet for active families will resist those dreaded “paths” that form in hallways. While older nylons needed topical stain treatments, modern versions often come with excellent built-in protection, making them top-tier choices for durable carpet for pets and kids in Santa Cruz.

Pros: Exceptional durability and resilience, excellent abrasion resistance (great against sand), easy to clean.

Cons: Generally the most expensive synthetic option; requires good stain protection to be effective.

Triexta (PTT/SmartStrand): The Stain-Fighting Specialist

Triexta, most famously marketed as SmartStrand, is a newer fiber offering a compelling mix of features. Its biggest selling point is its inherent stain resistance. Unlike other fibers that have topical treatment applied, SmartStrand (Triexta) carpet has stain and soil protection built into the fiber itself that will never wear or wash off. This is a huge benefit for families with toddlers and pets, as you can clean aggressively without worrying about removing protection. It’s also exceptionally soft and has good durability, making it a strong contender against nylon. You can find SmartStrand carpet showrooms in Santa Cruz to feel the difference yourself.

Pros: Permanent, built-in stain and soil protection; very soft feel; good durability and resilience.

Cons: A newer fiber, so its long-term (20+ year) track record is still being established compared to nylon.

Polyester (PET): The Value and Moisture-Resistance Leader

Polyester carpeting has improved dramatically in recent years. Made from PET, often from recycled materials, it’s eco-friendly carpet for healthy homes. Polyester is known for its vibrant color options and natural resistance to staining from water-based spills. A key benefit for our coastal environment is that Polyester (PET) carpet fibers are hydrophobic, meaning they repel moisture, which makes them a good choice for basements or areas with high levels of moisture. This inherent quality helps fight the dampness of the Santa Cruz climate. While not as resilient as nylon, new high-end polyesters offer much better durability than older versions, providing excellent, affordable carpet for families.

Pros: Excellent inherent stain resistance; hydrophobic nature repels moisture; budget-friendly; wide selection of colors and styles.

Cons: Less resilient than nylon or Triexta, can be prone to crushing in very high-traffic areas.

Rethinking Carpet Color and Style

Your choice of carpet color and pattern can work for you or against you. A solid, light-colored carpet in a home near the beach is a recipe for frustration. Instead, consider styles designed to hide the daily realities of active life.

Flecked or Multi-Tonal Colors: Carpets with multiple tones or flecks of different colors are brilliant at camouflaging dirt, sand, and pet hair. A light beige with flecks of brown and tan will hide sand far better than uniform cream color. This is the secret to what type of carpet hides dirt best.

Loop Pile (Berber): Berber carpet for kids and dogs is popular for good reason. Its looped construction is inherently durable and its often flecked appearance is great for hiding soil. However, be cautious if you have cats, as their claws can sometimes snag loops. A low-profile loop is a safer bet. This is a common choice for commercial-grade carpet for residential use due to its toughness.

Cut and Loop Patterns: This style combines cut fibers and looped fibers to create sculpted patterns. Not only does this add visual interest, but the pattern itself helps hide footprints and vacuum marks, keeping your flooring looking fresh even in busy family rooms.

Finding the Right Local Flooring Professional

Once you have a good idea of what you need, the next step is finding a professional. From flooring showrooms near Aptos to carpet suppliers in Watsonville, there are many places to shop for carpet in Santa Cruz. Look for local carpet fitting services that understand our unique environment. It’s wise to search for Diamond Certified carpet installers in Santa Cruz, as this certification indicates high levels of customer satisfaction. A reputable installer will offer shop-at-home carpet services, bringing samples to your house so you can see them in your own lighting. Always get multiple carpet installation quotes in Santa Cruz to compare costs and services. A trustworthy company will provide free carpet estimates and guide you through the entire carpet selection process for your home with children and pets.

Making the Right Choice for Your Needs

The Beach-Active Family

You live near the coast in Capitola or the Westside, and trips to the beach are weekly, if not daily, routines. Your primary concerns are sand abrasion and moisture. Your best bet is low-pile, high-density Nylon or Triexta carpet. Focus on flecked or multi-tonal color schemes that will hide sand. Pair it with high-quality moisture-barrier pads to handle wet towels and swimsuits. Durability and ease of cleaning are your top priorities.

The Pet-Centric Homeowner

Your home has multiple pets, and your biggest fears are stains and odors that won’t go away. You need the absolute best in stain protection. Solution-dyed Triexta (SmartStrand) carpet is an excellent choice due to its permanent, built-in stain resistance that can’t be washed away. Combining this with the best carpet padding for pet urine is critical. Moisture-barrier pads are musts to prevent accidents from ever reaching subfloors, thus eliminating sources of lingering odors.

The Busy Parents with Toddlers

Your world revolves around crawling, playtime, and inevitable spills. You need a balance of softness, stain resistance, and health-conscious materials. Solution-dyed polyester or softer Triexta offers a great blend of comfort and cleanability. Look for low VOC carpeting for homes with children to ensure healthy indoor environments. Cut-and-loop patterns can be great choices to hide inevitable footprints and provide some texture for little ones exploring.

Choosing the right flooring is a significant investment in your home’s comfort and value. By considering the unique environmental pressures of living in Santa Cruz—from abrasive beach sand to coastal humidity—you can select carpet that is not only beautiful but also incredibly durable. For a personalized assessment of your home and lifestyle, and to explore the best carpet selection with guidance from experts who understand our local needs, contact a professional for a free, no-obligation estimate today.

Filed Under: Uncategorized

  • Page 1
  • Page 2
  • Go to Next Page »

Quick Links

Your Local Leader in Beautiful Floors

Schedule a Free Estimate
Company Info
pin
Address

320A Coral Street, Santa Cruz

telephone
Phone Number

(831) 429-8221

mail
Email Address

dan@wdflooringoutlet.com

Quick Links

Hardwood

Carpet

Vinyl Plank (LVP)

Waterproof Laminate

Linoleum

Store Hours
Monday 10:00am - 5:30pm
Tuesday 10:00am - 5:30pm
Wednesday 10:00am - 5:30pm
Thursday 10:00am - 5:30pm
Friday 10:00am - 5:30pm
Saturday 10:00am - 4:00pm
Sunday closed

Schedule a Free Estimate

Contact Us
Sending

We Guarantee The Lowest Price!

Schedule a Free Estimate
Warehouse Direct
Warehouse Direct Flooring Outlet © 2025. All Rights Reserved